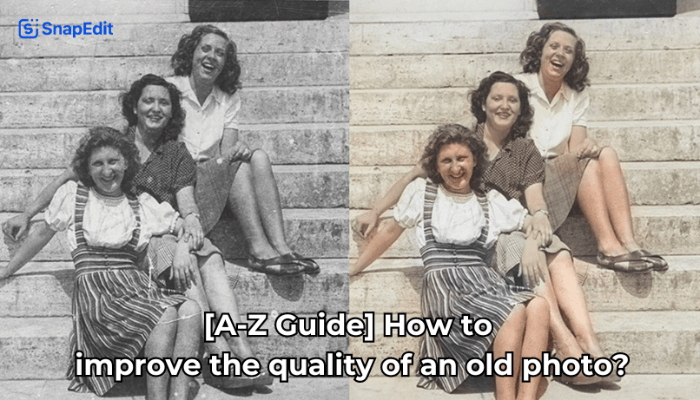
Restoring an old photo means repairing scratches, fading, and blur, then bringing back sharp detail and, if needed, natural color. AI tools like SnapEdit can do this in two separate steps: detail restoration first, then colorization for black and white photos. Most people finish both steps in under two minutes, right from a phone or browser.
Before you upload anything, though, there are two things worth knowing. AI restoration is fast and accessible, but it is not a full replacement for a professional retoucher on photos that truly matter. This guide walks through both paths so you can choose the right one for your photo.
Before You Start: Protect the Original Photo
Every restoration starts with a good digital copy. A physical photo only exists once, and any scratch, crease, or spill on the original cannot be undone once it happens.
Scan the photo at 600 dpi or higher using a flatbed scanner such as the Epson Perfection V600 or Canon CanoScan LiDE 400. Save the file as TIFF or PNG, not JPEG, since JPEG compression discards detail every time the file is saved.
If a scanner is not available, a smartphone photo works too. Place the original photo flat under even, indirect light, hold the camera parallel to avoid glare, and skip filters or auto-enhance at this stage. The goal of this first capture is accuracy, not beauty.
Keep the original scan untouched in a separate folder. Every edit from here on should happen on a copy, so there is always a clean file to go back to.
Can AI Really Restore Old Photos?
Yes, but with a limit worth knowing upfront. AI photo restoration tools like SnapEdit analyze patterns in millions of images to guess what a damaged or blurry area probably looked like. That guess is usually close, sometimes remarkable, but it is still a prediction, not a memory.
For personal use, this works well. Sharpening a grandparent's portrait, fixing a faded wedding photo, or reviving a childhood snapshot to share with family are exactly the kind of jobs AI handles fast and free.
For work that needs precision, a human retoucher is the safer choice. Museum archives, legal documents, or a portrait meant for large-format printing often need a specialist who can match brushstrokes to the exact grain and lighting of the original, something AI still cannot guarantee on every image.
The table below breaks down when each option fits best.
| Use Case | AI Restoration (SnapEdit) | Professional Retoucher |
|---|---|---|
| Family photo for sharing or printing at home | Best fit, minutes, free or low cost | Overkill for this |
| Wedding album with dozens of photos | Good fit, batch-friendly | Costly at scale |
| Severely torn or water-damaged heirloom photo | Limited, may distort fine detail | Best fit |
| Archival or museum-grade restoration | Not recommended | Best fit |
| Photo for large-format printing or gallery display | Use with caution | Best fit |
Step 1: Restore Detail and Sharpness with AI
The first step targets clarity: removing blur, reducing scratches, and rebuilding fine detail like facial features and texture. SnapEdit's AI photo restoration tool handles this step and works on both color and black and white photos.
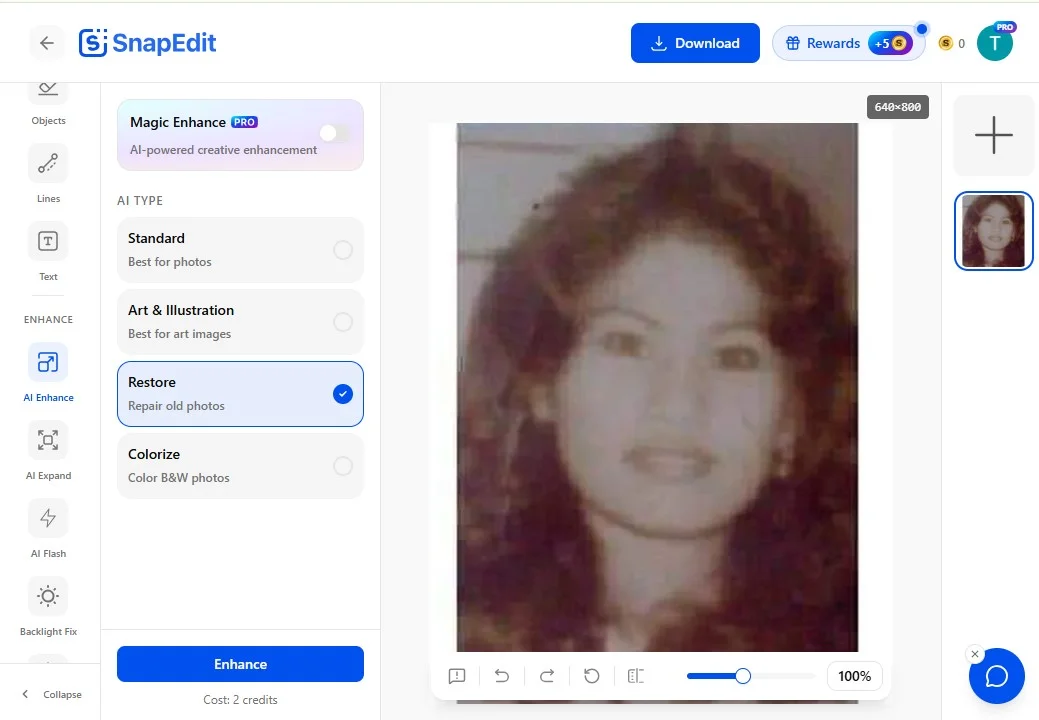
- Open SnapEdit in a browser or the mobile app.
- Select the restore old photo tool.
- Upload the scanned image.
- Let the AI process the photo, which usually takes a few seconds.
- Compare the before and after versions side by side.
- Download the restored file.
The AI model focuses on structural repair at this stage: scratches, cracks, dust spots, and soft focus. It does not add color to a black and white photo. That is a separate step, covered next.
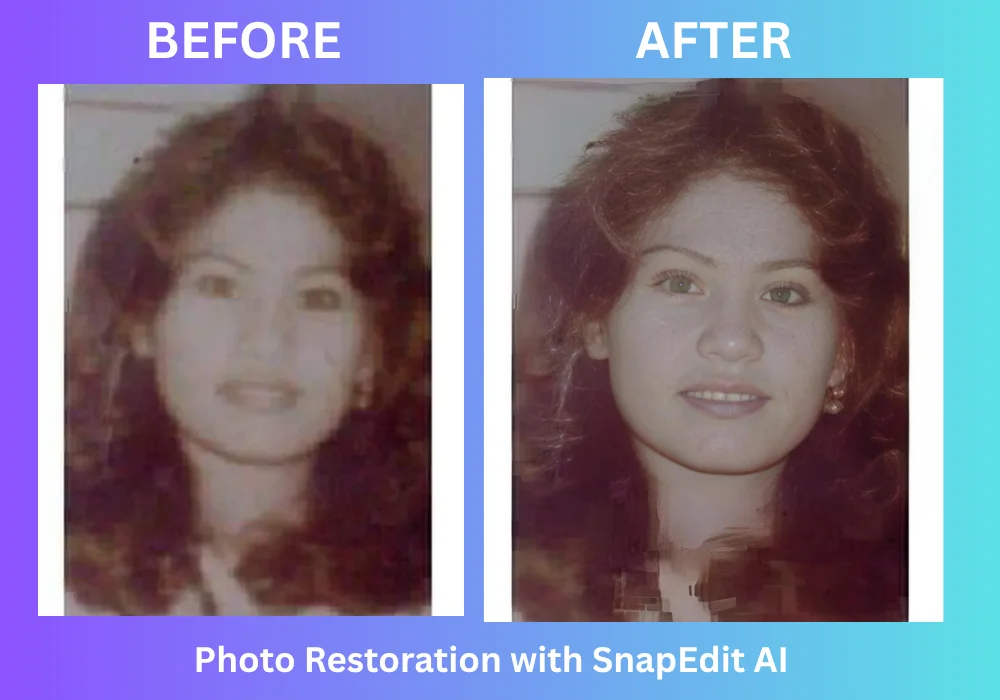
Orginal photo: Ok_Cut6513 on Reddit
Step 2: Colorize Black and White Photos (Optional)
If the original photo is black and white or sepia-toned, colorization is a second, independent step, done after restoration, not before. Running colorization on a photo that still has scratches or heavy blur usually produces worse results, since the AI colorizes the damage along with the image.
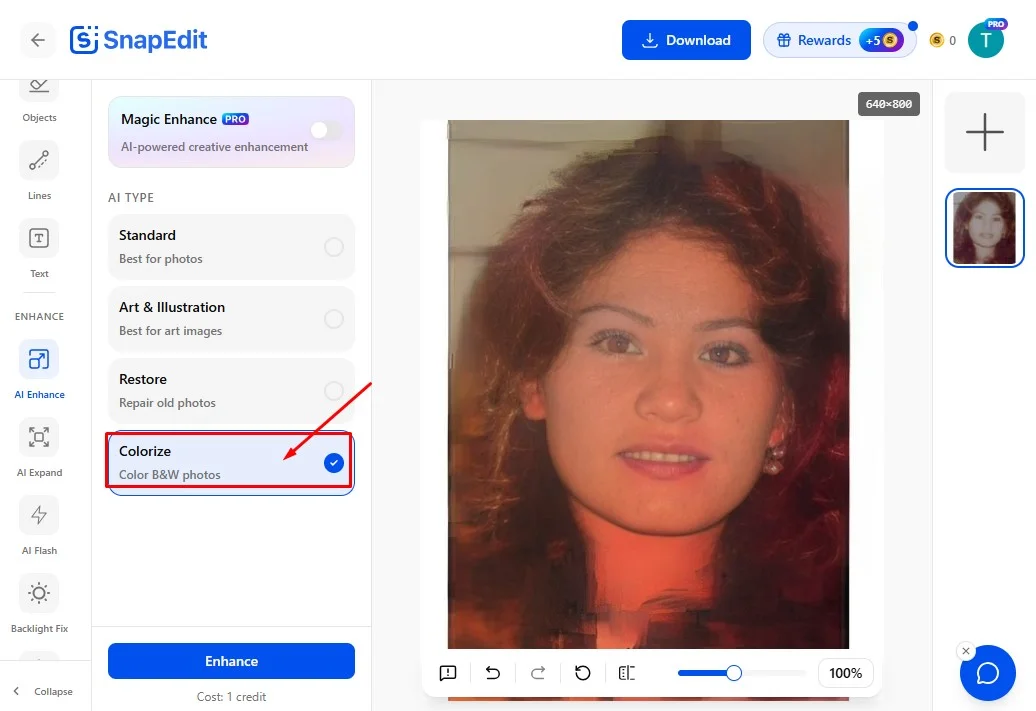
SnapEdit's AI photo colorizer adds realistic color to black and white photos by predicting likely tones for skin, clothing, and backgrounds based on similar images it has learned from. Skin tones and sky are usually the most accurate. Fabric patterns and painted objects are the areas most likely to need a manual touch-up afterward.
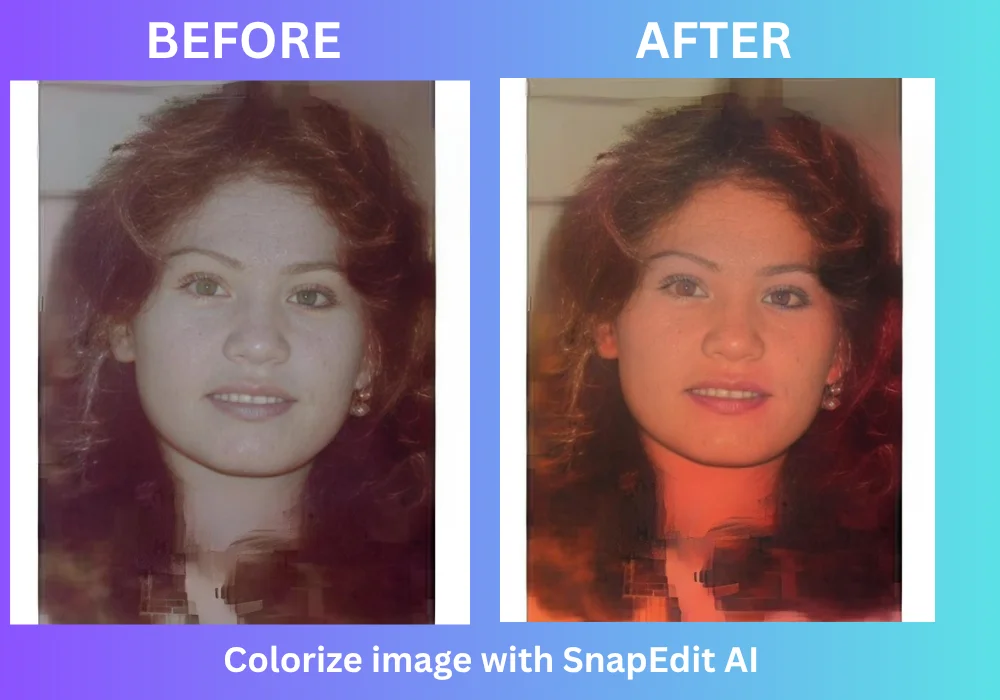
Skip this step entirely if the original photo already has color. Colorizing an already-colored photo will shift its natural tones and rarely improves the result.
Signs a Restored Photo Looks Too Artificial
AI restoration can overcorrect, especially on photos with heavy damage. A few signs to check before saving the final version:
- Skin looks unnaturally smooth, almost like plastic, with no visible pores or texture
- Eyes look glassy or slightly misaligned compared to the original
- Fine details like hair strands or fabric weave appear blurred into flat blocks of color
- Colorized areas look uniformly saturated, without the subtle variation real light creates
If two or more of these show up, try lowering the restoration intensity if the tool offers that option, or revert to a lighter edit. A photo that keeps small imperfections usually looks more honest than one scrubbed completely clean.
When to Hire a Professional Instead
A professional photo restorer is worth the cost in a few specific situations. The photo is the only surviving copy of someone who has passed away and needs to be exactly right. The damage is severe: large tears, missing sections, or water stains covering key details like a face. The final use is formal, such as a printed portrait for a memorial, a legal record, or a museum archive.
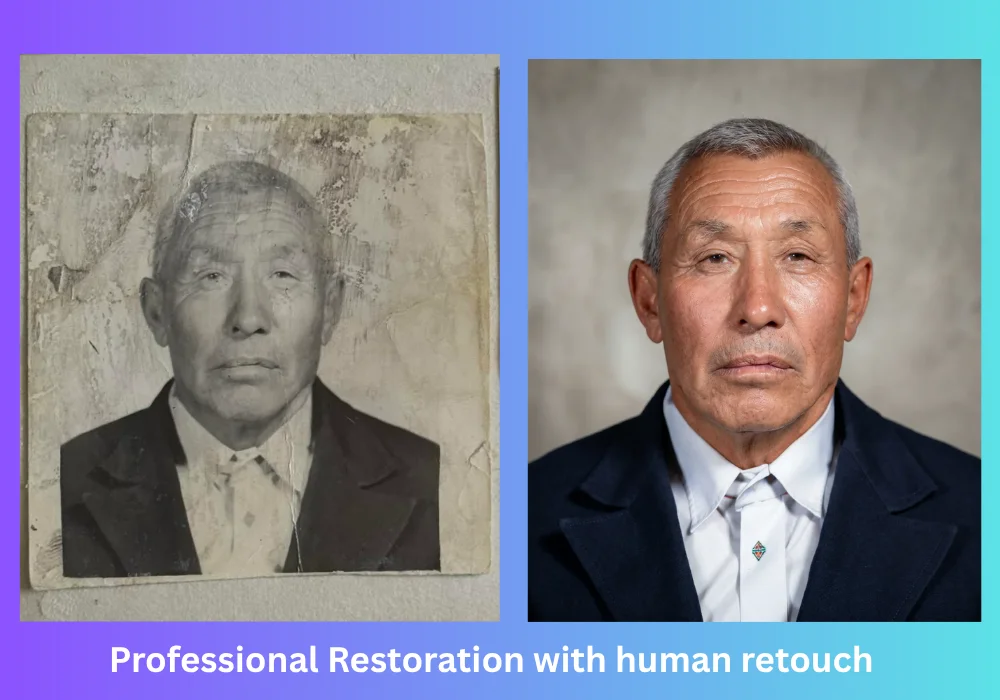
Services like MyHeritage Photo Restoration, PortraitFlip, and VanceAI Photo Restorer combine AI tools with human editors who manually verify facial features against reference photos. Expect turnaround times of a few days and prices that reflect hands-on retouching work, not instant AI processing.
For everyday family photos, AI restoration remains the faster and more practical starting point. Many people run a photo through SnapEdit first, then decide if it needs a professional's attention afterward.
After Restoration: Printing, Sharing, and Building an Album
A restored photo file behaves differently depending on what happens to it next. For printing, export at the highest resolution SnapEdit offers, since print quality depends on pixel density more than screen quality does. A photo that looks sharp on a phone screen can still look soft on a 8x10 print if the resolution is too low.
For sharing digitally, compress the file only after restoration is finished, never before. Compressing first strips detail that the AI restoration step cannot bring back.
Restoring an entire album works best in batches. SnapEdit's restore and colorize tools process one photo at a time in the free version, so budgeting time for a full album, rather than trying to finish everything in one sitting, keeps the process manageable.
For Developers: Add Photo Restoration to Your App
SnapEdit's restore and colorize models are also available through an API, separate from the consumer app. Developers building photo editing apps, print-on-demand platforms, or genealogy tools can call the same AI models that power SnapEdit directly, without building restoration technology from scratch.
The SnapEdit developer API exposes both the restoration and colorization models as independent endpoints, so an app can call one, the other, or both in sequence. Pricing and usage limits are listed on the API pricing page.
Frequently Asked Questions
Does AI photo restoration save or store my uploaded photos?
SnapEdit processes photos to generate the restored result and does not require the original file to remain on its servers after processing. Check the current privacy policy on SnapEdit's site for the most up to date details, since storage practices can change with new features.
Can AI restore a severely torn or water damaged photo?
AI can improve a severely damaged photo, but results are less reliable than on photos with only fading or minor scratches. For photos with large missing sections, a professional retoucher who can reconstruct detail by hand usually produces a more accurate result.
Should I restore or colorize a black and white photo first?
Restore first, then colorize. Restoration fixes scratches, blur, and damage. Colorization adds color afterward, and works best on a clean, already-repaired image.
Is AI photo restoration free?
SnapEdit offers free restoration and colorization for individual photos, with paid plans for higher volume or batch processing through the API.
Final Thoughts
AI has made photo restoration accessible to anyone with a phone, and for personal memories, that is genuinely enough most of the time. A grandmother's portrait, a childhood photo, a faded snapshot from a wedding: these are exactly the photos AI restoration handles well.
For anything more permanent or precise, a professional restorer with a trained eye is still the safer choice. Start with SnapEdit's photo restoration tool to see what AI can do with the photo, then decide from there.