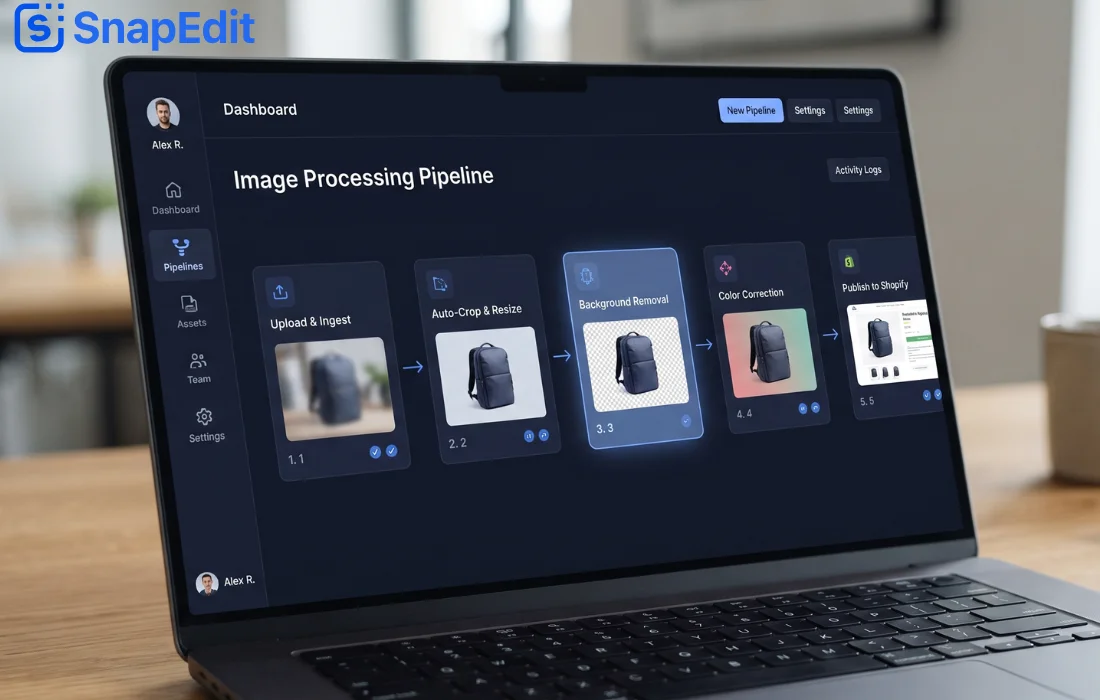
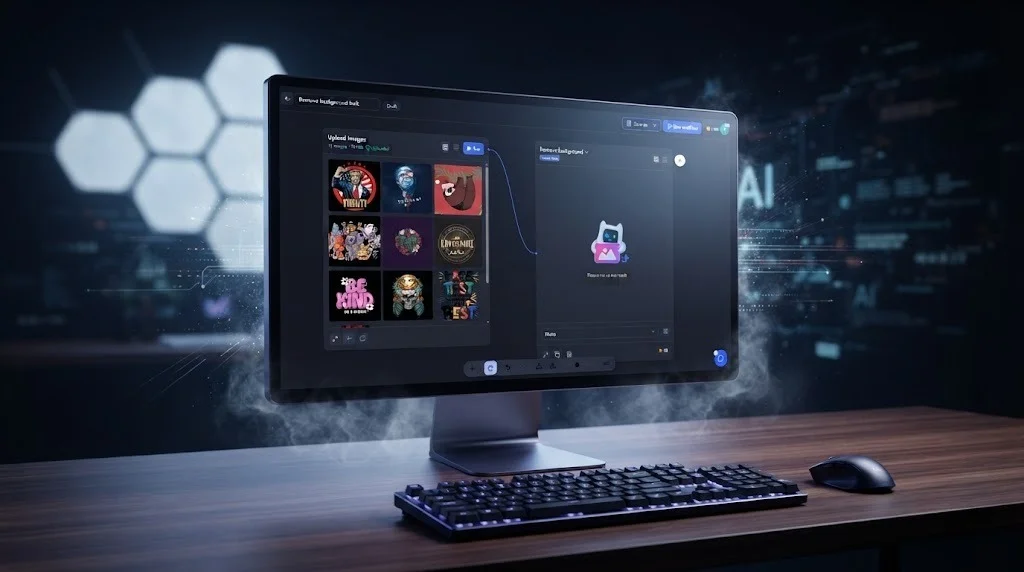
To build an AI image editing workflow, define the finished image first, choose a type of tool, pick three or four editing steps, put them in the right order, test the chain on a few photos, then save it as a template. These six steps apply in any tool, from a no-code builder to ComfyUI or n8n.
This guide explains each step, then builds a real example in SnapEdit's AI image editing workflow builder. If the idea is new to you, start with what a photo editing workflow actually is.
How to Plan and Build the Workflow in 6 Steps
Most failed workflows fail before the first node is placed. The first two steps below are planning, and they decide whether the other four go smoothly.
1. Define the finished image first
A workflow needs a target. Before you open any tool, write down what one finished photo must look like:
- Background: pure white, transparent, or a lifestyle scene
- Aspect ratio: 1:1, 2:3, 3:4, or whatever your sales channel uses
- Size: the pixel length of the longest side
- File format: PNG for transparency, JPG for standard listings
Your sales channel sets most of these. An Amazon main image needs a pure white background, while a print-on-demand design needs a transparent PNG. Every editing step you add later exists to hit one line on this list. If a step doesn't serve the list, leave it out.
2. Choose the type of workflow tool
"AI image editing workflow" means different things in different tools. Five types cover most of what you'll find.
| Tool type | Examples | Starts from | Best when |
|---|---|---|---|
| No-code photo workflow builder | SnapEdit Workflow | Photos you already have | A batch of product photos needs the same chain of edits |
| Node-based generative canvas | ComfyUI, Krea Nodes, Figma Weave, Freepik Spaces | A prompt or a reference image | You create new visuals and want deep control over each step |
| Automation platform with an image API | n8n, Make, Zapier | A trigger, such as a new file | Edits must run automatically inside a bigger pipeline |
| Desktop batch actions | Photoshop Actions | A folder of files | You only need resize, crop, or watermark |
| Photography post-production | Imagen, Lightroom Classic | A shoot of RAW files | You cull and color-edit thousands of photos from a shoot |
SnapEdit Workflow is built around the life of a photo you already have. You upload an image, chain together edits, and get a finished version back. Remove the background. Build a new one. Sharpen it. Crop it to size.
A broader automation tool like n8n does something different. It can generate images from nothing, no source photo required, and push the finished result out to a website, a social account, or a dozen other systems at once. That's orchestration across tools. SnapEdit Workflow is focused on the photo itself.
The two aren't rivals. You can call SnapEdit through the API as one step inside a bigger n8n pipeline, the part that handles image editing, while n8n handles everything happening before and after it. For a side-by-side walkthrough, see how to automate batch photo editing with SnapEdit, Photoshop, and n8n.
3. Start with three or four editing steps
Resist the urge to chain every node on the list into one workflow on day one. Start with the smallest version that solves your actual problem.
For most product photos, that's three steps: Remove Background, Generate Background, Upscale. Nothing more. Once that chain runs reliably, add a fourth step, Crop Image or Add Watermark, and test again.
A workflow with 3 steps you understand beats one with 8 steps you're not sure about.
Here's the full node list available in SnapEdit Workflow right now.
Steps that run on a click or a simple setting:
- Blur Background
- Easy Shadow
- Change Sky
- Colorize
- Crop Image
- Resize Image
- Remove Background, choose the photo or graphic model
- Add Background, pick or upload the background you want
- Remove Object, AI detects unwanted objects and clears them automatically, choose the GAN or SD model
- Upscale, choose 2x, 4x, or 8x
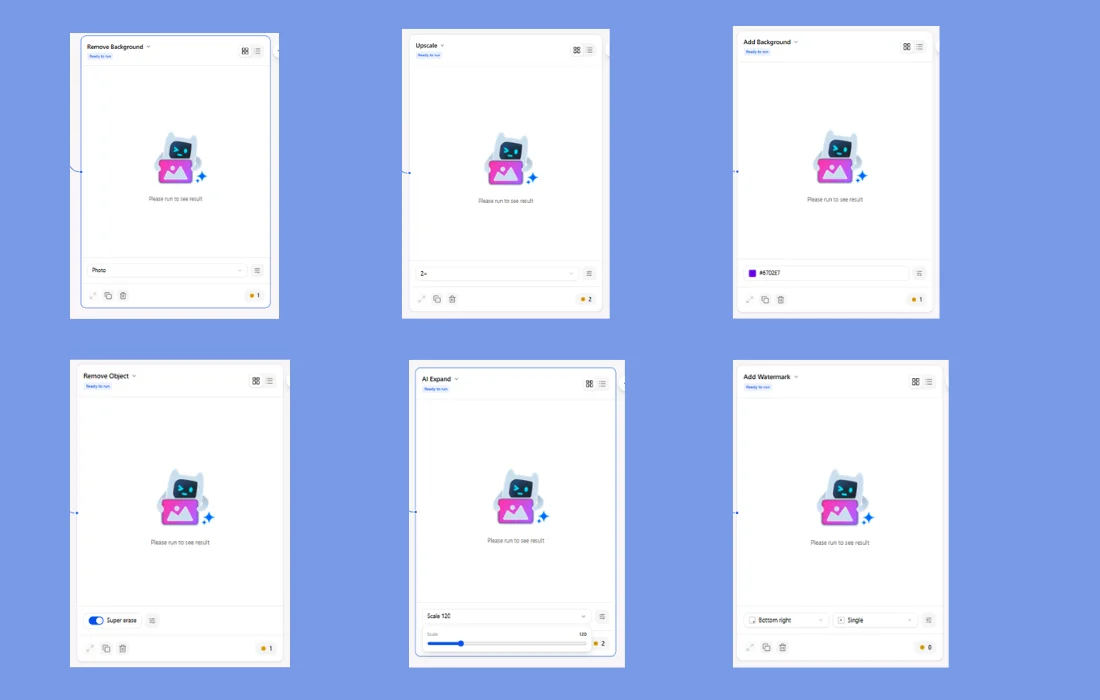
Steps that need a bit more input. These ask for a prompt or an upload before they run:
- Generate Background, describe the new scene in a prompt
- AI Expand, optionally guide the new space with a prompt
- Add Watermark, upload a logo or type the text to watermark
Ten steps run on a click or a setting. Three ask you to tell the AI what you want first. Knowing which is which before you start building saves you a surprise mid-workflow.
One naming note: Enhance is a group on the canvas, not a single step. It holds Upscale and Colorize.
4. Put the steps in the right order
Each step works on the output of the step before it, so the order changes the result. A simple rule covers most chains: clean up, build the scene, sharpen, size, then brand.
| Position | Steps | Why this position |
|---|---|---|
| First | Remove Object | Distractions are cleared before any other step spends effort on them |
| Second | Remove Background, then Add Background or Generate Background | The subject is isolated before a new scene is built around it |
| Third | Upscale | Sharpening runs on the finished image, so the subject and the new background are sharpened together |
| Fourth | Crop Image, Resize Image | Resize sets exact pixel dimensions, and an Upscale placed after it would change them |
| Last | Add Watermark | Nothing after it can alter or cover the mark |
For any step outside this table, ask one question: does a later step change what this step just produced? If yes, move it later.
5. Test the workflow on three photos
Before you point a saved workflow at a full batch, run it on two or three photos first. Pick different ones: your easiest photo, your hardest, and a typical one.
Then check four things:
- Edges: the background removal is clean around hair, straps, and thin parts
- Scene: the generated background matches the prompt you wrote and looks alike across the test photos
- Framing: the crop ratio didn't cut off part of the product
- Spec: the size and format match what you wrote down in step 1
Catching a problem on 3 photos costs you a minute. Catching the same problem after running the full batch costs you the whole batch.
The test also tells you the cost. In SnapEdit, Remove Background costs 1 credit per image, Generate Background costs 5, and Upscale 2x costs 2. That three-step chain costs 8 credits per photo, so the test run uses 24 credits and a batch of 40 photos uses 320.
SnapEdit Workflow has no fixed limit on the number of photos in one run. Your account only needs enough credits to cover the batch. For a fuller breakdown, see what a workflow costs per image.
6. Save the workflow as a template
Once a workflow runs clean on your test photos, save it. That's the entire point of building one in the first place. You shouldn't have to reconstruct the same sequence from scratch every time a new batch of photos lands in your folder.
Label every step clearly before you save. Each node on the canvas can be renamed. Do it. "Generate Background" tells you less than "Generate Background, marble counter, product line A."
This matters more than it sounds like it should. Six months from now, when volume's grown and someone else on the team is running this workflow, a clear label saves them from opening every step just to figure out what it does.
Next week's batch, same product line, same background: open the saved workflow, upload the new photos, run it. No rebuilding required.
How to Write a Prompt That Works Across a Whole Batch
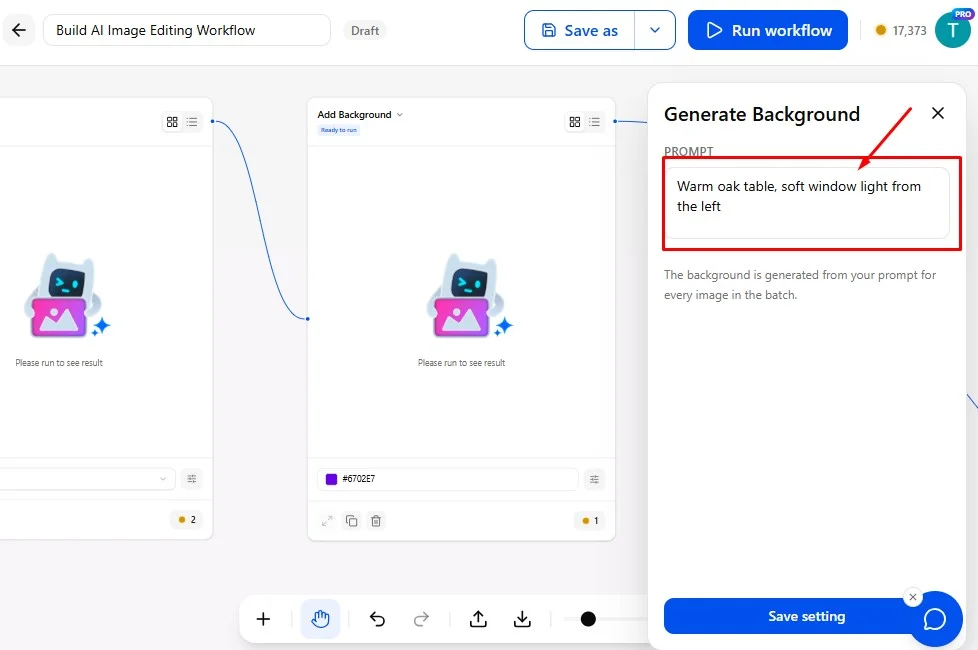
Some steps need a prompt, not just a click. Generate Background is the clearest example. Drag it onto the canvas, and it won't run until you write something like "marble kitchen counter" or "soft gray studio backdrop." That one line of text becomes the scene every photo in your batch gets dropped into.
A few things make batch prompts work better.
Be specific about material and light. "Wood table" is vague. "Warm oak table, soft window light from the left" gives the AI something concrete to build.
Keep the prompt consistent if you want a consistent batch. One prompt runs across every photo in the set, so if you want all 40 product shots to look like they belong in the same catalog, write one prompt that describes that shared look, not a different idea for each photo.
Test the prompt on one photo before running the full batch. Cheaper, faster, and it catches a bad description before it's applied 40 times over.
Need starting points? Here are AI background generator prompts for product photos you can adapt.
How to Build a Sample Workflow for Print-on-Demand Designs
Say you sell T-shirts, mugs, and tote bags on Etsy, and need clean design files to place on mockup product images. The finished image from step 1 is simple: a sharp design on a transparent background, saved as PNG.
- Add Remove Background and choose the graphic model. It is tuned for logos, stickers, and illustrations. No prompt needed, drop it on the canvas.
- Add Upscale from the Enhance group and choose 2x. It sharpens detail in the design.
- Rename each step so the workflow reads clearly top to bottom.
- Upload 3 test designs. Run the workflow. Check the edges, check that the background is fully gone, check the sharpening.
- Looks right? Run the full batch of 30.
- Save the workflow as "POD designs, background removed, 2x upscale."
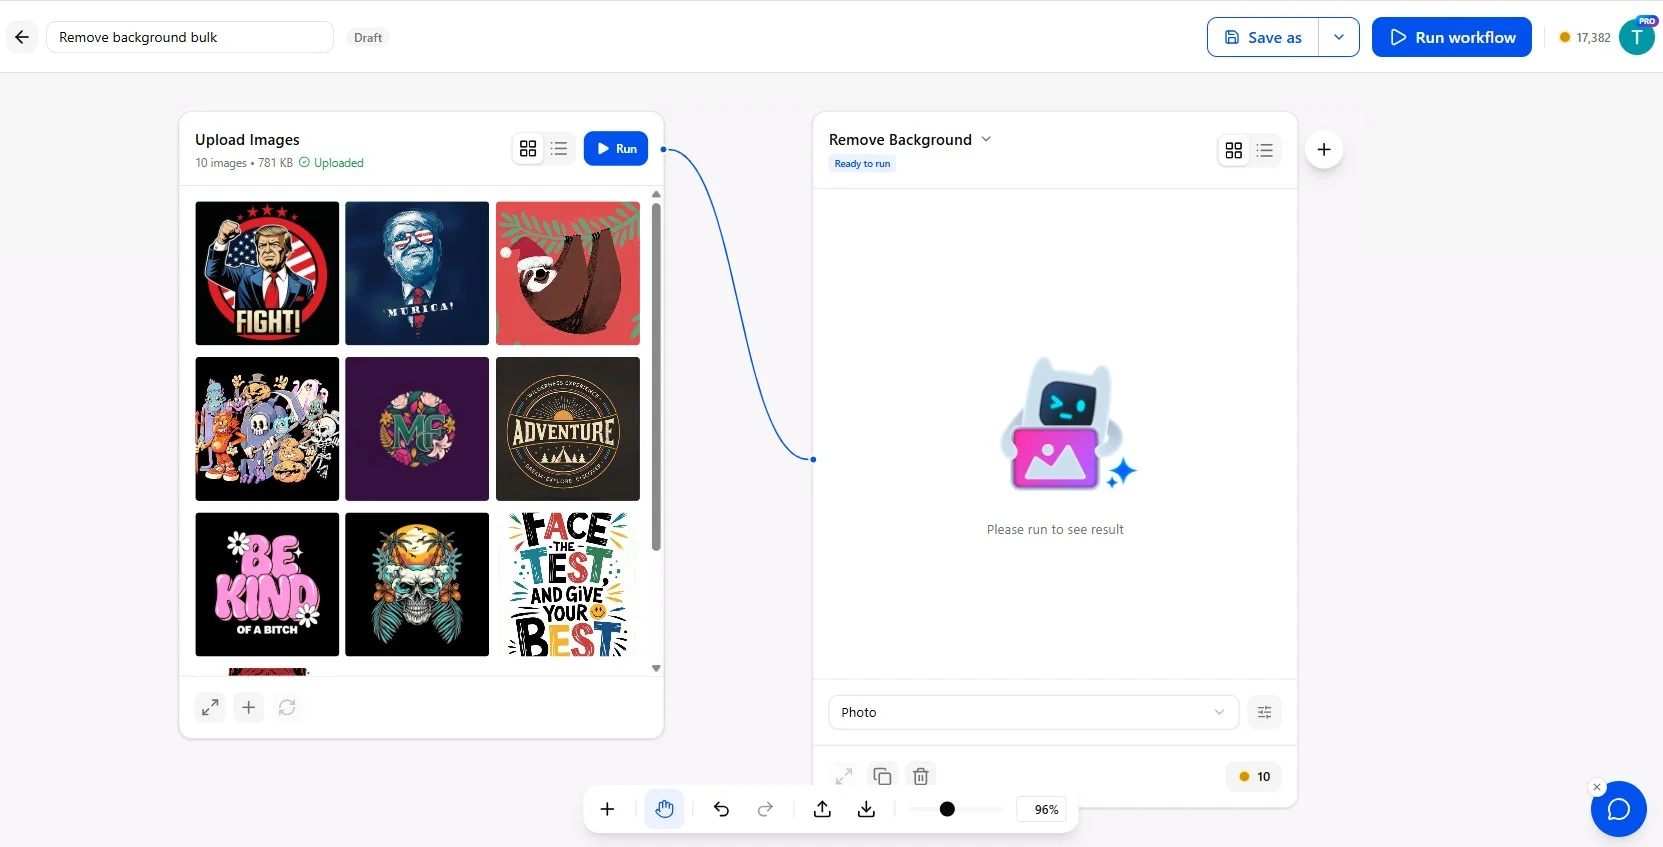
This chain costs 3 credits per design, 1 for Remove Background and 2 for Upscale 2x. The batch of 30 uses 90 credits.
Next batch, same two steps, same settings, same result. No rebuilding. For a longer walkthrough of this use case, see the bulk photo editing workflow for POD and Etsy.
Ready to build your first one? Start in SnapEdit Workflow.
How to Build the Same Workflow in Other Tools
The six steps stay the same in every tool. What changes is how much you set up yourself.
Use n8n with an image API
In n8n, each editing step is an HTTP Request node that sends the photo to an image API and passes the result to the next node. You start with a trigger, such as a new file in a folder, and end with a node that saves the output.
You need an API key and some comfort with request settings. SnapEdit's editing models are available this way through one key. See the SnapEdit API docs for the request format.
Use ComfyUI
ComfyUI is an open-source, node-based tool for running AI image models. It runs on your own computer, and Comfy also offers a cloud version with no local install.
ComfyUI gives you control over every part of a generative pipeline. In return, you choose and load the models yourself, and editing steps such as background removal usually come from community-built nodes that you add. It suits teams that create new visuals more than teams that clean up existing product photos.
Use Photoshop Actions
In Photoshop, you record an Action once, then run it on a folder through File > Automate > Batch. It works well for the sizing and branding steps: resize, crop, and watermark.
Actions replay the same recorded moves on every file. That makes them a good fit for the last two positions in the order table, and a weaker fit for AI steps that must adapt to each photo.
How to Tell When You Need the API Instead
A few signs it's time to look at the API instead of the canvas.
Your workflow needs conditional logic, do X if the photo has a busy background, do Y if it doesn't. The builder runs a fixed sequence, it doesn't branch.
You need the edit to trigger automatically, no one opening SnapEdit and clicking run, the process kicks off the moment a photo lands somewhere in your system.
You're already building a bigger pipeline elsewhere, in n8n or your own platform, and need SnapEdit's editing steps to plug into it as one link in a longer chain.
Our guide on Workflow Builder vs API breaks down exactly when each makes sense.
Frequently Asked Questions
Should I build a complex workflow right away?
No. Start with 3 to 4 steps that solve one clear problem, test it, then add more once you trust it.
How many photos can one workflow process?
SnapEdit Workflow has no fixed limit per run. The batch size depends on your credits, because every step costs credits for each photo it processes.
How much does an AI image editing workflow cost per photo?
Add up the credits of each step. In SnapEdit, Remove Background costs 1 credit, Generate Background costs 5, and Upscale costs 2, 4, or 8 credits for 2x, 4x, or 8x. A chain of Remove Background, Generate Background, and Upscale 2x costs 8 credits per photo.
Can I call SnapEdit from inside n8n?
Yes, through the API. n8n can orchestrate the broader pipeline, generating content, publishing to social, updating a website, and call SnapEdit for the image editing step specifically.
Does SnapEdit Workflow generate images from scratch?
Not currently. Every step works from a photo you upload. Generate Background builds a new scene, but it still needs your original product photo as the starting point.